|
|
|
|
中文版 | News | Archives | Reviews | Forum | $ Deals | Links | History | Contact | Privacy |
|
| ||||
Gigabyte i-RAM Review 3/7
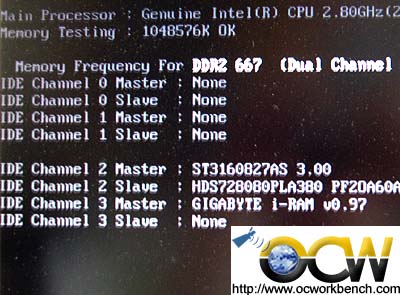
Installation Installation is pretty straightforward. Plug your ram modules onto the any of the 4 DIMM slots of the daughter card. Plug the card into any of the vacent PCI slot. Plug the SATA connector with the provided SATA cable onto the SATA I/II port of your mainboard. Once that is done, power up the system and you should see that it is recognised as a hard disk. The i-RAM is recognised as a HDD plugged into Channel 3 Master.
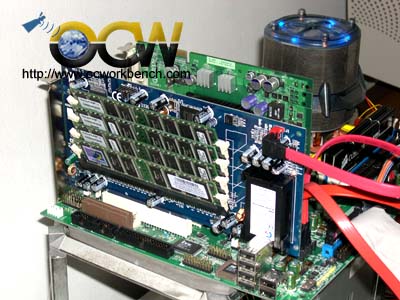
This is how it lookes like when the card is sloted into PCI 3 of our mainboard. I used a mixture of DDR400 modules from different manufacturers. As the clk runs at 133MHz, all ram modules from your old PC2100, PC2700, PC3200 can all be mixed and match. This is done for maximum compatibility. As the SATA bandwidth is limited compared to the memory, even if the clk runs at DDR400, the performance won't be that much of a difference.
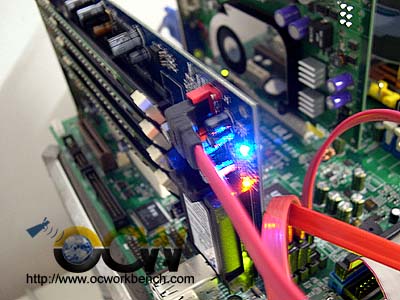
Below is a picture of the LED lights on the card after powered up. There are 4 LEDs. PHY_READY
(blue) i-RAM is correctly detected
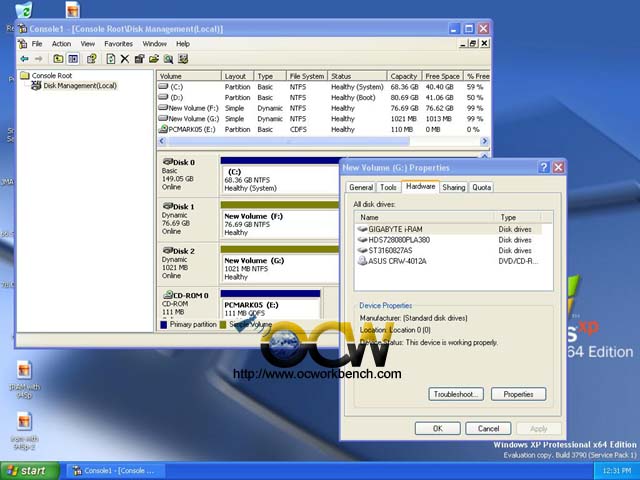
After all is done, the system will boot into Windows and it will treat this device as a SCSI device. you have to go to MMC->Disk Management to create the partition (depends on how much memory you put in). Format the partition to FAT32 or NTFS and you are ready to test the performance.
Next >>> |
|
(C) Copyright 1998-2009 OCWorkbench.com
|